By Lisa Phifer
February 27, 2009
This new Wi-Fi-enabled NVR simplifies residential video surveillance.
Related Articles
- Control Your Home with iPhone
- Los Angeles Deploys Wireless Video Surveillance Network
- Southlake, TX Deploys Wi-Fi Video Surveillance
- Improving Security with Wi-Fi Video Surveillance
AVerDiGi EB1704HB WiFi-4

www.avermedia-usa.com
Price: $1,599 (CMOS) or $2,599 (CCD)
Pros: Super-simple hardware installation; plug-and-play set-up; Web and mobile video viewers
Cons: No Pan-Tilt-Zoom over Wi-Fi; non-reconfigurable WLAN; motion recording problems
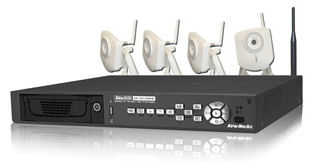
When we saw the AVerDiGi EB1704HB WiFi-4 at CES 2009 ShowStoppers, we were intrigued. At first glance, this plug-and-play Network Video Recorder (NVR) with four Wi-Fi cameras seemed to be ideal for no-frills-no-fuss video surveillance in homes, “mom and pop” shops, and small offices. But when we took the EB1704HB WiFi-4 home for a test drive, we encountered a few surprises that prevented this innovative bundle from realizing its full potential
Snag-free installation
Getting the EB1704HB WiFi-4 up and running couldn’t be much easier. Just unpack the NVR and plug it into a VGA monitor or TV. Position the four ready-to-roll Wi-Fi cameras wherever surveillance is desired, plugging each into an AC wall socket, and Voila! Instant live video feed, displayed on a quad-split preview screen. Yes, basic installation really is this simple.
But don’t declare victory just yet. Recording video requires you to install a SATA disk. We were surprised that a turn-key bundle didn’t include storage, but adding your own drive does let you balance space vs. recording quality and cost (see calculator). Just insert a compatible HDD into the easily-accessible bay on the NVR’s front panel. Recommended disks range from 250 to 750 GB; the $50 40 GB Seagate we used worked fine and took days to fill at “high” quality.
You don’t have to run Ethernet cables to the included Wi-Fi cameras (although you can if you wish). You don’t have to buy or connect analog video cameras (although four analog ports let you do so). You are, however, limited to no more than four (4) Wi-Fi, Ethernet, and/or analog cameras. And, when it comes to Wi-Fi cameras, we discovered that you must use those supplied with the NVR.
What you see is what you get
Bundled Wi-Fi differentiates this plug-and-play NVR from other AVerDiGi surveillance systems. Larger businesses can combine sibling NVRs like the EB1704HB DVD with a lengthy list of supported (non-Wi-Fi) cameras. But the entry-level EB1704HB Wi-Fi4 is paired your choice of two factory-configured Wi-Fi camera models: CCD or CMOS.
CCD cameras use charge coupled devices to capture and convert light into images, while CMOS cameras use less expensive (and less sensitive) complementary metal oxide semiconductors. CCD cameras usually render higher-quality images under varied lighting conditions, while CMOS cameras are more compact and power-efficient.
| The CCD cameras supplied with the full-blown EB1704HB WiFi-4 ($2,599) appear to be bigger and better than the CMOS cameras included with our EB1704HB WiFi-4 “Lite” bundle ($1,599). In particular, the CCD bundle supports Day/Night Mode and Infrared Filtering—features that can be essential for after-hours surveillance. Unfortunately, the SerCom RC8020 cameras in our CMOS bundle (see right) lacked brightness or contrast controls. In afternoon or evening indoor light, they generated grainy images containing digital noise that appears to have triggered motion-based recording. |  |
Both supplied camera models transmit dual MPEG4 and M-JPEG streams at rates up to 30 frames-per-second, with very respectable 640 x 480 max resolution. However, both camera models are fixed-focus. The EB1704HB NVR can send pan-tilt-zoom (PTZ) commands, but only to IP or analog cameras actually that listen to PTZ protocols and use them to adjust position or focus. Since the NVR’s integrated 802.11g AP connects only to the factory-configured Wi-Fi cameras, we found that there was no way to use pan-tilt-zoom during wireless surveillance.
Lack of wireless PTZ made the EB1704HB WiFi-4 less useful than we’d anticipated. According to AVerMedia, good PTZ Wi-Fi cameras are still too expensive for the average homeowner. Agreed – but we believe that some would pay $200 apiece for PTZ-capable cameras, just as some will pay for more light-sensitive CCD cameras. Pre-configured Wi-Fi cameras are a big part of this bundle’s charm, but an upgrade path would make the EB1704HB WiFi-4 a better investment.
Getting on-line
EB1704HB WiFi-4 configuration can be accomplished by pushing buttons on the NVR’s front panel or using the included remote to interact with the on-screen display menu (see below). After initial set-up, the NVR can also be reconfigured through Internet Explorer.

First-time set-up tasks include formatting the disk, setting passwords, enabling video and/or audio recording for each camera, and establishing an hourly recording schedule. Default settings are sufficient to get rolling—reaching this point took us less than 30 minutes, including camera placement. However, you must enable network access and determine the NVR’s IP address before you can preview, store, or play back video from afar.
These and many other configurable parameters are described in a 66-page illustrated manual on the included CD. Given this product’s entry-level market, a bare minimum Getting-Started worksheet would be a nice addition. For example, the CD includes five programs but no guidance as to which must be installed or why. By trial and error, we found there was really no need to install anything from CD—most users can proceed directly to the WebViewer.
Going remote
After initial set-up, we powered off our NVR’s monitor and relied upon the WebViewer (below). Like most network media servers, the EB1704HB WiFi-4 provides web-based configuration and content delivery. Of course, to render audio and video feeds, the NVR needs more than a basic HTML portal. But rather than use a common media player, the EB1704HB WiFi-4 downloads and installs a WebCamX ActiveX control, with optional DirectDraw video optimization.

At this stage, we encountered our first stumbling block. For starters, you must use Internet Explorer, configured to permit ActiveX installation. (Sorry Firefox users!) Through experimentation, we learned that administrative rights are necessary to complete the install. At that point, our WebViewer launched, prompting for User ID and Password. We dutifully entered the factory-set ID and our 6-digit PIN, triggering a login failure pop-up.
After a day of trouble-shooting, a laptop without anti-virus did the trick. It turns out that anti-virus programs like our lab standard ESET NOD32 block the WebCamX control. We bypassed this problem by disabling ESET’s web access protection and configuring an exception. To AVerMedia’s credit, the NVR’s home page does warn that “some anti-virus software may deny the connection.” However, we believe that the average homeowner would benefit from a more complete list of WebViewer dependencies and potential work-arounds.
Once connected to the NVR, we found this ActiveX GUI relatively easy to navigate. As shown above, the default quad-split screen displays live “preview” video feeds from all four Wi-Fi cameras. From here, you can easily click on any pane to view a single camera, digitally enlarge to full-screen mode, enable/disable audio, or take still BMP snapshots.
PTZ controls (see above, top right) come in handy to fine-tune the vantage point of any PTZ-capable camera. Since we were working without PTZ, we carried a wireless laptop running the WebViewer to each camera mount point, letting us visualize and tweak our fixed camera angles.
As its name suggests, the WebViewer is a convenient way to watch live video in near-real-time. In our experience, the bandwidth consumption shown above (48 KBps) was typical when using the WebViewer’s LAN mode to view video recorded at High quality by all four cameras. We also used the WebViewer over slower remote Internet connections, although you may want to crank down traffic by adjusting quality or frame rate or selecting just one camera to preview.
Gaining control
Clicking the WebViewer’s remote set-up button requests a “superuser” login before launching the control panel shown below. This two-stage login gives view-only access to the ordinary network user ID while restricting remote configuration to the superuser ID. Many settings established through the NVR’s on-screen display can be modified through WebViewer remote set-up, including user passwords, recording parameters, camera brightness and contrast (for analog cameras only), NVR IP address, and DDNS-enrolled hostname (to facilitate Internet video access).

The Alarm setup panel (above) lets you send email whenever a physical sensor connected to the NVR triggers an alarm condition. In addition to cameras, the EB1704HB WiFi-4 can be connected to up to 4 external sensor devices and one relay device. Such devices can be used, for example, to turn on a light and start recording whenever a door is opened. External sensors and relays are not supplied along with the EB1704HB WiFi-4 but can be purchased separately. The NVR can also generate an audible alarm whenever video feeds are lost—we found this more useful for Ethernet cameras than for Wi-Fi cameras where occasional disconnects are normal.
Sensor Recording is one of four recording modes supported by the EB1704HB WiFi-4. We tested the other three modes: Always Recording, Button (manual) Recording, and Motion Recording. The NVR’s recording schedule specifies a single mode for each one hour period. We configured our EB1704HB WiFi-4 to record full-time during the day but for just 60 seconds whenever motion was detected off-hours.
Always and Button recording worked as expected, but we never could get Motion Recording to really work for us. As shown above, cameras are individually configured to enable Motion Recording—those cameras must detect motion to trigger recording for the specified duration. Sensitivity tunes the degree of motion required to trigger recording. These camera parameters are combined with the NVR’s recording schedule to enable Motion Recording during selected hours.
In theory, motion-based recording conserves storage by saving only video following events of interest. This makes it far easier to locate noteworthy events when conducting video surveillance over lengthy periods. Unfortunately, our Wi-Fi cameras appeared to always detect motion, resulting in full-time recordings. According to tech support, this might be caused by flickering pixels (digital noise) being perceived as motion. We tried reducing sensitivity, using bright lights, connecting cameras to Ethernet to reduce RF-induced noise—all without success. At press time, tech support was evaluating a possible NVR/camera version mismatch as the culprit.
Looking back
After video has been recorded, there are many ways to play it back. Anyone local to the NVR can use front-panel buttons or the remote control to play, pause, or fast-forward recorded segments on a connected monitor—using the NVR more or less like an ordinary VCR.
Alternatively, recordings can be replayed remotely using a Remote Console program (see below). This Win32 executable can be installed manually from CD or downloaded automatically from the NVR the first time you push the WebViewer’s Remote Console (Playback) button. Like the WebViewer, the Remote Console can be used to preview live video. However, the Remote Console goes much further by enabling network-based video storage and playback.


Whenever the Remote Console is launched, it prompts for the NVR’s User ID and password. Once connected to the NVR, the Remote Console two supports two playback methods:
1) Video stored on the NVR’s HDD can be played remotely, either by downloading an available time period for immediate playback or by watching a replayed video stream.
2) Video recorded by the NVR can also be relayed to the Remote Console program as a live video feed, to be duplicated onto that remote host’s HDD for local playback in the future.
The first method (remote playback) use the NVR as central storage but results in considerable delay whenever you want to play video back remotely. Just choose a date, hour, and camera of interest, then select from a series of still snapshots which represent available video segments. You can start watching NVR-recorded video during file download, but transfers usually take longer than playback. We thus learned to be very selective when selecting time periods for download.
The second method (local playback) requires the Remote Console program to run continuously while recording to the remote host’s HDD—in essence, behaving as network-attached storage. The Remote Console is somewhat picky about storage locations—for example, you cannot designate a USB thumb drive or an HDD without copious free space. But once you have recorded video locally, playback is fast and easy.
Search and find
To this end, the Remote Console offers two extremely handy playback tools: Visual Search and Intelligent Search. During a Visual Search, you wade through still snapshots for available time periods, drilling down into shorter periods until you find the video segment that you’re looking for. This is can be very helpful when searching for a recognizable event in a lengthy recording (e.g., a package being dropped at your door sometime last week.) But it can also be tedious.
Intelligent Search helps by detecting occasional motion in an otherwise still area. To perform an Intelligent Search, select an area of a camera pane you wish to analyze. Then click the Intelligent Search button—recorded video plays until the Remote Console spots movement in that area, at which time playback is paused. You can’t use Intelligent Search effectively in a high-traffic or windy outdoor area. But we found it extremely helpful for scanning footage of indoor venues where off-hours movement was unexpected. (Note that Intelligent Search analyzes recordings for motion, independent of camera-triggered Motion Recording.)
During our review, we relied primarily upon the WebViewer and the Remote Console. We also used the included USB Playback Console, a Win32 utility for watching video segments dumped from the NVR to a USB stick. USB playback is essential in cases where the NVR is not network-accessible—for example, video exported for third-party (e.g., legal) review. Exported snapshots and clips are time-stamped and can even be digitally “watermarked” with an overlay image for source verification purposes. However, video files are so large (and writing them to the NVR’s USB port is so slow) that we prefer to use the Remote Console whenever feasible.
| We has less luck using the WinCE PDAViewer. According to tech support, this program runs on Windows Mobile 6, but it could not be installed on our WM6 smartphone. When we tried the PDAViewer on an older Pocket PC, the program ran but refused to connect to our EB1704HB WiFi-4 (see right). The PDAViewer sounds sexy and it certainly could be handy in a pinch. But, from a practical standpoint, we think that most consumers will prefer to preview live video on a laptop or perhaps a netbook. |  |
We also installed the included Central Monitor System (CM3000), a Win32 program designed for multi-NVR installations where security staff monitors up to 1000 distributed locations. We had no trouble connecting our EB1704HB WiFi-4 to the CM3000. But we chose not to review the CM3000 because it lies beyond the average homeowner’s needs or skills.
Finally, none of these supplied programs incorporate Help menus. We found the WebViewer and Remote Console intuitive enough that Help was not really necessary. Nonetheless, Help menus would be a welcome addition to this entry-level bundle.
On the air
Other comparably-priced home surveillance systems exist, but Wi-Fi drew us to the EB1704HB. Tech-savvy consumers might combine their own wireless router with an NVR and third-party IP cameras. This is not rocket science—but it requires more network-know-how than your average homeowner or “Mom and Pop” shopkeeper possesses. The EB1704HB WiFi-4 is designed to fill this gap by completely avoiding Wi-Fi device integration and network setup.
To accomplish this goal, AVerMedia factory-configures bundled Wi-Fi cameras to match the NVR’s embedded 802.11g AP settings. We used a WLAN analyzer (below) to identify our unit’s non-beaconed SSID (EB1704HB_WiFi4_040020) and security policy (AES encryption, WPA2-PSK authentication). Oddly, we also spotted our cameras probing for an enterprise WLAN named AP350—perhaps a network used for camera configuration or testing back at AVerMedia?

Note that it is impossible to connect your own desktop, laptop, or PDA to this secure WLAN without knowing the factory-configured PSK. In theory, WPA2 PSKs can be guessed through brute force cryptanalysis. In practice, we doubt that AVerMedia chose a short text passphrase vulnerable to WPA PSK cracker dictionary attack. As a result, the NVR-camera WLAN is private; it cannot be eavesdropped upon or used to carry other traffic (including remote preview or playback traffic).
In fact, AVerMedia intentionally obscures all Wi-Fi settings to discourage end-user modification. When connected via Ethernet, camera web configuration portals can be reached but are password-locked to prevent customer (or hacker) access. Similarly, the NVR’s on-screen display does not expose any of the embedded AP’s network or security parameters. The net effect is to insulate the surveillance WLAN from customer configuration mistakes—or site-specific Wi-Fi tuning.
In the unlikely event that a bundled Wi-Fi camera is lost or damaged, customers must call AVerMedia to request a factory-configured replacement. Upon receipt, the replacement camera must be connected directly to the NVR using a cross-over Ethernet cable; the NVR’s on-screen display menu is then used to invoke an IPCam (re)registration scan. This methodology facilitates field repair, but it also prevents consumers from adding their own after-market Wi-Fi cameras.
Wireless performance
Perhaps more importantly, this closed-system approach makes it difficult to detect or avoid localized RF interference problems.
As shown below, the our surveillance WLAN performed reasonably well, sending mostly mid-size frames with few CRC errors. Positioned at the periphery of a typical 3000 square foot two-story home, three out of four Wi-Fi cameras exhibited solid signal strength. The most distant camera, roughly 100 feet from the NVR, experienced frequent but brief connection losses.

This performance is comparable to other residential-grade 802.11g APs. Your mileage will vary, depending upon your own venue’s construction—and the presence or absence of RF interference.
For example, a home with an existing wireless router could encounter RF interference if the EB1704HB WiFi-4 used an overlapping channel. Today, many residential routers seek out cleaner channels on their own. But those that do not would experience degraded WLAN performance following NVR installation. It would be difficult for end users or tech support to diagnose RF interference without visibility into the NVR’s factory-assigned channel.
In our case, the NVR we tested was factory-configured to use channel 13. This unusual assignment interfered just slightly with a neighboring 802.11n AP on channel 11. When we asked AVerMedia how to change this channel, we learned that end-user reconfiguration was not possible. According to AVerMedia, our review unit used a channel between 1 and 13 because it was developed at the company’s headquarters and not changed to the US-defined range (1-11). The company plans to update firmware on all US EB1704HB WiFI-4 units to revert to the US-defined range in the near future. (Firmware updates are normally issued on monthly or at least quarterly basis.)
Finally, home and small business WLANs are transitioning rather quickly to 802.11n Draft 2.0. Based on our traffic measurements, the EB1704HB WiFi-4’s surveillance WLAN would not utilize the added capacity delivered by 11n. However, this NVR could benefit from 11n’s improved reach and reliability—even if only the NVR’s AP were upgraded in a future release.
Bottom line
In our experience, the EB1704HB WiFi-4 is a very quick and easy way to roll out an indoor video surveillance system in a smallish venue with no pre-existing WLAN. Unless your venue is brightly lit during recording hours, we recommend springing for the CCD camera bundle.
For users that already have a home or small office WLAN, this product’s turn-key value proposition is not so clear-cut. Here, plug-and-play setup is a time-saver, but not essential. While isolating surveillance traffic on a closed, secure WLAN is still attractive, Wi-Fi-experienced consumers may prefer to have more control over WLAN settings and/or camera selection.
Lisa Phifer owns Core Competence, a consulting firm focused on business use of emerging network and security technologies. She has been involved in the design, implementation, assessment, and testing of NetSec products and services for over 25 years.

- AVerMedia AVerDiGi EB1704HB WiFi-4 - October 19, 2021
- Wi-Fi Planet Guide to Hotspot Safety - October 19, 2021
- Meraki Enterprise Cloud Controller for APs (Part 3) - January 12, 2012